
How To Resize Images Without Losing Quality? (Best For Websites)
On this page, I will show you some free tools to resize your images and reduce their file sizes while maintaining a good quality.
Why you should resize your images before uploading them to your website!
Large Images are often big in file size and can take up a lot of disk space on your server. Additionally, images with a large file size can slow down your pages and affect the loading speed of your website.
There is no need to use superb quality images because they are more likely to be 1 MB or more in file size. You don’t want to host images on your website before reducing their size first. Here’s how I try to optimize the file size as much as possible:
- If I’m working with small images (500 x 500 pixels or less), I usually try to reduce their file size to 100 KB or less.
- If I’m working with large images (1000 x 1000 pixels or above), I don’t want their size to be larger than 500 KB.
Sometimes, it’s hard to get the desired quality for your image after resizing it or optimizing its file size. But don’t worry because there are several tools to help you achieve that. Below are some of the tools that I like to use on a regular basis to reduce the file size of my images even without changing their dimensions.
How to Resize and Optimize your images for the web:
One of the good free tools I’ve found is called Irfanview, it’s a very simple image viewer and it has some nice options not only for optimizing your images but for adding some cool effects, color adjustment, and more.
It’s great as you can resize and optimize your images with a few clicks and you have control over the image quality and type. The only drawback I’ve found about Irfanview is that it doesn’t keep transparency when resizing transparent images in PNG format. It will reduce the file size or image dimensions but, it will completely remove the transparency so If you are working with transparent images, then you would need to use a different tool.
Other than that, it’s a great simple tool and it will make your life easier and save you time. You don’t need to know how to work on photoshop or buy an image program. You can download Irfanview free here.
How to use Irfanview to resize and optimize images:
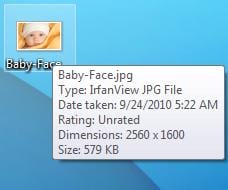
Here is an example of a (2560 x 1600 pixels) image with a file size of 579 Kb and JPG type. Let’s see how we can fully resize and optimize this image:
1) Open the image using Irfanview, and go to Image >Resize/Resample.

On this screen, you can choose any of the standard dimensions shown on the right side, or you can set a new size. If you want to set a specific width and height for your image, uncheck the preserve aspect ratio, otherwise, you will need to keep it checked. You have the option to view and resize your image in Pixels, cms or inches, which is great because most tools have only pixels.
2) In this example, I set the new size to be 600 width x 375 height, then I clicked the “OK” button. Now, the image is resized inside Irfanview but it is not yet saved (It won’t replace your original image)
3) In order to save the new image, you will need to go to file> save as
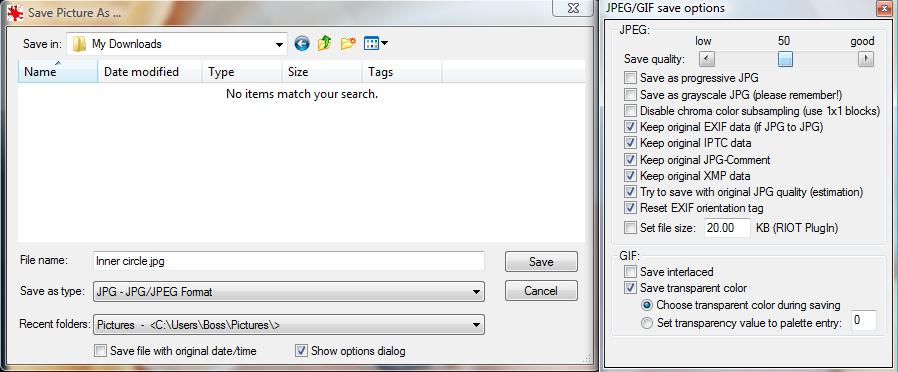
This step is very important as it will determine the file size and quality of the image.
You can increase or decrease the “Save quality”, the more the quality the higher the image file size. If you go below 50 the image could have a very low resolution or bad quality, I recommend you choose between 50 – 80 and see how that affects your image quality.
Another thing that will affect the file size is the image type that you choose. I have found that JPG/JPEG images usually have the lowest file size and they are good in quality, so I recommend that you always save your images in JPG/JPEG format.
Back to my example, I’ve done all those 3 steps and I have saved the image. The new image is (600×375 pixels) with a very good quality and it’s only 83.4 KB. The old image was (2560 x 1600 pixels) and its file size was 579 Kb.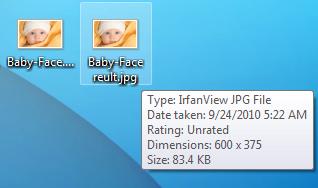
You can play with the Irfanview options to optimize your images even more and get the best quality and size for your images. Additionally, you may also use any of these free online tools to optimize your images further, they will do the magic of reducing the file size of your images (including PNG or transparent images).
If you enjoyed this post, don’t forget to like, comment, and share.


Thanks for the step by step guide, Andrew. I would like to add an online option that I use when I do not have the option to install software on my PC (I am using my university PC in which I can not install any software). For this situation, imageresize.org is a lifesaver.
Hi Rodrigo,
Thank you for your comment. I agree, using online image resizing tools are helpful especially if you can’t or don’t want to install any software on your computer.